Rustic Italian Chicken Parmesan Alla Casa
A gourmet Italian-American classic featuring crispy golden breaded chicken cutlets topped with rich San Marzano tomato sauce, melted fresh mozzarella, aged Parmesan, and fragrant basil. Finished in the oven until bubbling and served over perfectly cooked pasta, this restaurant-quality Chicken Parmesan delivers the perfect balance of crunchy, cheesy, and savory flavors.
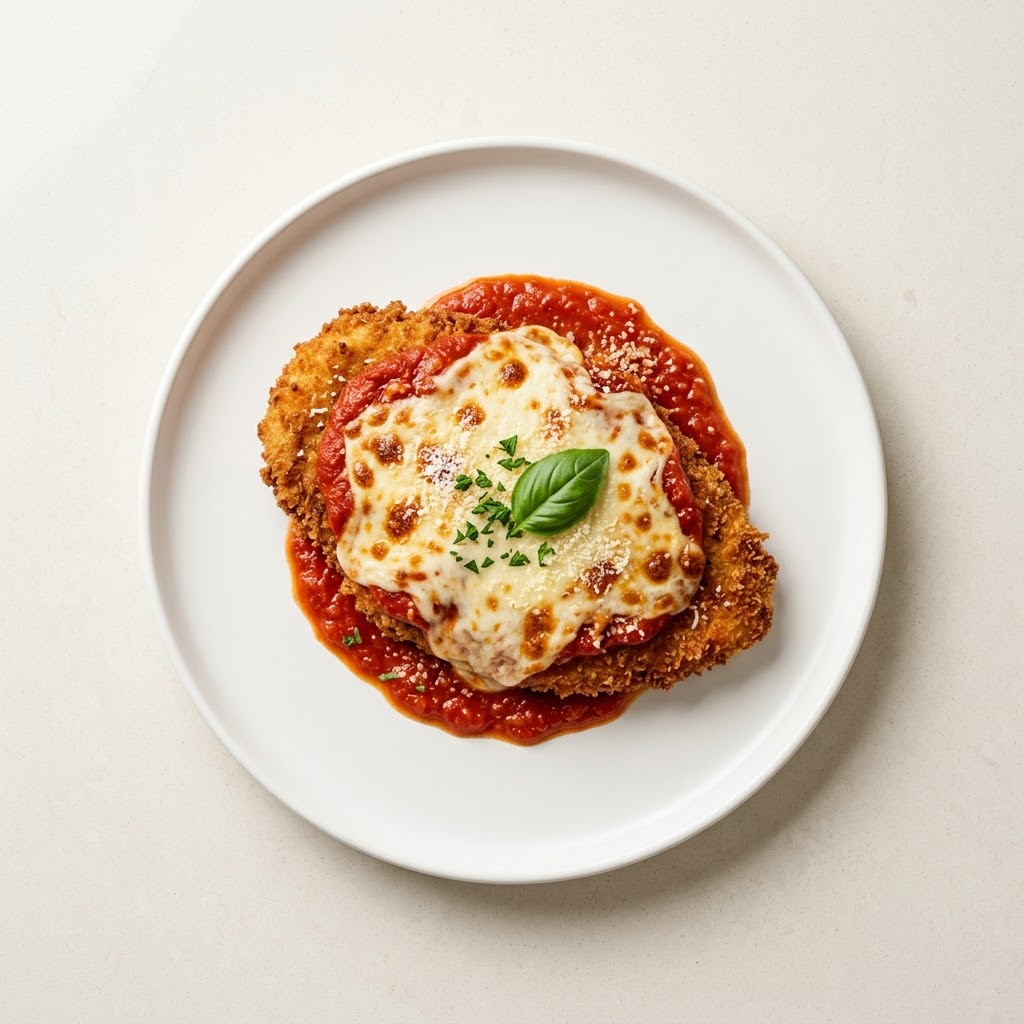
Rustic Italian Chicken Parmesan Alla Casa
shopping_basketIngredients
- Boneless Skinless Chicken Breasts2 large, butterflied and pounded into 4 thin cutlets
- Salt1 1/2 tsp, or to taste
- Freshly Ground Black Pepper1 tsp
- All-Purpose Flour1 cup
- Large Eggs2, beaten
- Italian Breadcrumbs1 1/2 cups
- Panko Breadcrumbs1/2 cup
- Parmesan Cheese1/2 cup, finely grated
- Garlic Powder1 tsp
- Dried Oregano1 tsp
- Olive Oil3 tbsp
- Vegetable Oil1/4 cup, for frying
- Marinara Sauce2 cups, preferably homemade or San Marzano-based
- Fresh Mozzarella8 oz, sliced
- Fresh Basil10 leaves, plus extra for garnish
- Spaghetti12 oz, cooked al dente (optional for serving)
Nutrition Per Serving
Calories
685
Protein
52g
Fat
31g
Carbs
45g
restaurantInstructions
Prepare the Chicken
Place each chicken breast between two sheets of plastic wrap and gently pound to an even thickness of about 1/2 inch. Season both sides generously with salt and freshly ground black pepper.
Even thickness ensures the chicken cooks uniformly and remains juicy throughout.
Prepare the Breading Station
Arrange three shallow dishes. Fill the first with flour. Beat the eggs in the second. In the third, combine Italian breadcrumbs, panko breadcrumbs, grated Parmesan, garlic powder, and oregano. Mix thoroughly so every bite is evenly seasoned.
Bread the Chicken
Coat each chicken cutlet in flour, shaking off any excess. Dip into the beaten eggs, allowing excess egg to drip off, then press firmly into the breadcrumb mixture until completely coated on both sides.
Press the breadcrumbs firmly onto the chicken instead of simply rolling them. This creates a thicker, crispier crust that won't fall off during frying.
Fry Until Golden
Heat the olive oil and vegetable oil together in a large skillet over medium heat. Fry the chicken cutlets for approximately 3 to 4 minutes per side until beautifully golden brown. The chicken does not need to be fully cooked at this stage because it will finish cooking in the oven. Transfer to a wire rack or paper towel-lined plate.
Prepare for Baking
Preheat the oven to 400°F (200°C). Spread a thin layer of marinara sauce over the bottom of a baking dish to prevent sticking. Arrange the fried chicken cutlets on top, leaving a little space between each piece.
Add Sauce and Cheese
Spoon marinara sauce over each chicken cutlet, leaving the edges uncovered to preserve the crispy coating. Top with slices of fresh mozzarella, a sprinkle of Parmesan cheese, and a few basil leaves.
Avoid drowning the chicken in sauce. Keeping the edges exposed maintains the signature crispy texture.
Bake
Bake uncovered for 15 to 18 minutes, or until the chicken reaches an internal temperature of 165°F (74°C) and the cheese is melted, bubbling, and lightly golden.
Prepare the Pasta
While the chicken bakes, cook the spaghetti in generously salted boiling water until al dente. Drain and toss lightly with a small amount of olive oil or a few spoonfuls of warm marinara sauce to prevent sticking.
Rest and Plate
Allow the Chicken Parmesan to rest for 5 minutes before serving. Place each cutlet over a bed of spaghetti or alongside roasted vegetables. Spoon a little extra warm marinara around the plate and garnish with fresh basil and additional Parmesan.
Resting allows the cheese to set slightly and keeps the crispy coating intact when serving.
Serve
Serve immediately with garlic bread, Caesar salad, roasted asparagus, or a glass of sparkling water with lemon. Leftovers can be refrigerated for up to 3 days and reheated in the oven to maintain the crispy coating.
Reheat Chicken Parmesan in a 350°F oven instead of the microwave to preserve its crisp texture and prevent the breading from becoming soggy.
Cooking Mode
Keep your screen awake with step-by-step guidance.
You might also like...
More inspirations from your digital sous-chef.